


 All Articles
Commercial Saunas for Gyms, Hotels and Resorts in Thailand
The sauna in a private garden is used four or five times a week by the same two…
27 Aug 2026
Read more
Free Delivery · 1–2 Yr Warranty · After-sales Support
Everything you need to run your RonYen ice bath — first set-up with diagrams, the cleaning routine with and without a chiller, and care for inflatable baths. Bookmark this page — the QR sticker on your chiller always lands here.ทุกอย่างที่ต้องรู้ในการใช้อ่างน้ำแข็ง RonYen — การติดตั้งครั้งแรกพร้อมแผนภาพ ขั้นตอนทำความสะอาดทั้งแบบมีและไม่มีชิลเลอร์ และการดูแลอ่างเป่าลม บุ๊กมาร์กหน้านี้ไว้ — สติกเกอร์ QR บนชิลเลอร์ของคุณจะพามาที่หน้านี้เสมอ
Seven steps, about half an hour, with the diagrams to match.เจ็ดขั้นตอน ใช้เวลาราวครึ่งชั่วโมง พร้อมแผนภาพประกอบ
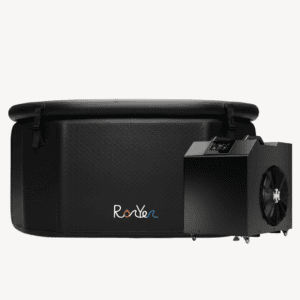
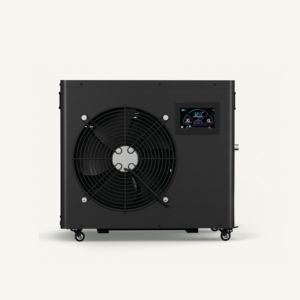
Beside the bath, on the same level as it — not above. Lock the castors and give it room to breathe on every side; it pulls air through itself to shed heat. Do not plug it in yet.วางข้างอ่าง ในระดับเดียวกับอ่าง — ไม่ใช่สูงกว่า ล็อกล้อ และเว้นที่ว่างรอบด้านให้ระบายอากาศ เพราะเครื่องดูดอากาศผ่านตัวเองเพื่อระบายความร้อน ยังไม่ต้องเสียบปลั๊ก
A filled bath weighs several hundred kilos — make sure your flooring can hold the weight.อ่างที่เติมน้ำแล้วหนักหลายร้อยกิโล — ตรวจให้แน่ใจว่าพื้นรับน้ำหนักได้
Wrap the threads with plumber's tape, then hand-tighten. Direction matters: the chiller's OUT goes to the bath's IN, and the bath's OUT returns to the chiller's IN.พันเกลียวด้วยเทปพันเกลียว แล้วขันด้วยมือให้แน่น ทิศทางสำคัญ: ช่อง OUT ของชิลเลอร์ต่อเข้าช่อง IN ของอ่าง และช่อง OUT ของอ่างกลับเข้าช่อง IN ของชิลเลอร์
Tap or garden hose, straight in. The water surface must sit above the chiller's inlet — this is the rule that makes everything work. If the chiller's inlet is above the waterline, the pump sucks air instead of water.ใช้น้ำประปาหรือสายยางเติมได้เลย ผิวน้ำต้องอยู่เหนือช่องน้ำเข้าของชิลเลอร์ — นี่คือกฎที่ทำให้ทุกอย่างทำงาน ถ้าช่องน้ำเข้าอยู่เหนือระดับน้ำ ปั๊มจะดูดอากาศแทนน้ำ
Upper limit: keep it below the bath's own inlet fitting.ขีดบน: ให้ต่ำกว่าข้อต่อน้ำเข้าของตัวอ่าง
The filter housing is under the cap on top of the chiller. Open it, pour water in until full, seat the paper filter element, tighten the cap hand-tight.ช่องไส้กรองอยู่ใต้ฝาด้านบนของชิลเลอร์ เปิดฝา เทน้ำลงไปจนเต็ม ใส่ไส้กรองกระดาษให้เข้าที่ แล้วขันฝาด้วยมือให้แน่น
Never start a chiller dry — an empty pump runs loud and wears itself out.ห้ามเปิดชิลเลอร์ตอนไม่มีน้ำ — ปั๊มเปล่าจะเสียงดังและสึกหรอเร็ว
Breaker first, then the power button. Plug into a standard 220–240V wall socket.เปิดเบรกเกอร์ก่อน แล้วกดปุ่มเปิดเครื่อง เสียบเข้าปลั๊กผนัง 220–240V มาตรฐาน
No extension cords. Water and power share this corner of your garden — the chiller plugs directly into the wall, always.ห้ามใช้ปลั๊กพ่วง มุมนี้ของสวนมีทั้งน้ำและไฟ — ชิลเลอร์ต้องเสียบปลั๊กผนังโดยตรงเสมอ
Check the panel: water flow should read above 15 L/min.ดูที่หน้าจอ: อัตราการไหลของน้ำควรเกิน 15 ลิตร/นาที
Set your temperature on the touchscreen or in the app — anywhere from 0 to 42°C, so the same bath does cold plunges and hot soaks. Put the lid on while it pulls down; it gets there noticeably faster.ตั้งอุณหภูมิที่หน้าจอสัมผัสหรือในแอป — ได้ตั้งแต่ 0 ถึง 42°C อ่างเดียวกันจึงใช้แช่เย็นหรือแช่อุ่นก็ได้ ปิดฝาไว้ระหว่างที่เครื่องทำความเย็น จะถึงอุณหภูมิเร็วขึ้นชัดเจน
Plunge, then switch it back on when you're out.แช่ให้เสร็จ แล้วค่อยเปิดเครื่องอีกครั้งเมื่อขึ้นจากอ่าง
| Bath sizeขนาดอ่าง | Waterปริมาณน้ำ | First pull-down, 1.5HP*ทำความเย็นครั้งแรก, 1.5HP* |
|---|---|---|
| Barrelทรงถัง | 320 L320 ลิตร | ≈ 4 hours≈ 4 ชั่วโมง |
| Tub-classขนาดอ่างใหญ่ | ~500 L~500 ลิตร | ≈ 6 hours≈ 6 ชั่วโมง |
| Largeขนาดใหญ่พิเศษ | ~800 L~800 ลิตร | overnightข้ามคืน |
*From 30°C tap water down to 5°C — a 1.5HP chiller moves roughly 1 hour per 80 litres; a 2.0HP roughly 1 hour per 100 litres, so scale the times down.*จากน้ำประปา 30°C ลงถึง 5°C — ชิลเลอร์ 1.5HP ใช้เวลาประมาณ 1 ชั่วโมงต่อ 80 ลิตร; รุ่น 2.0HP ประมาณ 1 ชั่วโมงต่อ 100 ลิตร จึงใช้เวลาน้อยลงตามส่วน
Two honest ways to run it — pick whichever suits your mornings.สองวิธีใช้งานตรง ๆ — เลือกแบบที่เข้ากับเช้าของคุณ
Lid on, it just sits there cold, ready whenever you are.ปิดฝาไว้ น้ำก็เย็นรออยู่ พร้อมทุกเมื่อที่คุณพร้อม
Holding costs ~0.5 kWh a day — a few baht per day.การรักษาความเย็นใช้ไฟราว 0.5 หน่วยต่อวัน — ไม่กี่บาทต่อวัน
Set the app timer — on at 5am, ready by 10am, off after the last plunge at 10pm, lid on overnight. With the lid on, the water only drifts a few degrees, so the morning re-cool is 1–2 hours, not a full pull-down.ตั้งเวลาในแอป — เปิดตี 5 พร้อมใช้ 10 โมงเช้า ปิดหลังแช่ครั้งสุดท้ายสี่ทุ่ม ปิดฝาข้ามคืน เมื่อปิดฝา น้ำจะอุ่นขึ้นเพียงไม่กี่องศา การทำความเย็นตอนเช้าจึงใช้เวลา 1–2 ชั่วโมง ไม่ใช่ตั้งแต่ต้น
Schedule for noise (52 dB — fridge-quiet, but it's your call at 3am) or preference, not cost.ตั้งเวลาเพราะเสียง (52 เดซิเบล — เงียบระดับตู้เย็น แต่ตอนตี 3 คุณตัดสินเอง) หรือตามความชอบ ไม่ใช่เพราะค่าไฟ
App control — set schedules and change the target temperature from anywhere. Your bath is cold before you're home.ควบคุมผ่านแอป — ตั้งเวลาและปรับอุณหภูมิได้จากทุกที่ อ่างเย็นพร้อมก่อนคุณถึงบ้าน
Check the airflow clearance around the chiller, then rinse the filter — those two solve almost every case.ตรวจระยะระบายอากาศรอบชิลเลอร์ แล้วล้างไส้กรอง — สองอย่างนี้แก้ได้เกือบทุกกรณี
Check the base is level and the castors are locked — a rocking chiller hums louder than it should.ตรวจว่าพื้นได้ระดับและล็อกล้อแล้ว — ชิลเลอร์ที่โยกจะดังกว่าปกติ
Air is trapped inside (common when both bath fittings sit under the waterline). Open the drainer briefly to bleed it out; flow recovers straight away.มีอากาศค้างอยู่ข้างใน (พบบ่อยเมื่อข้อต่อทั้งสองของอ่างอยู่ใต้ระดับน้ำ) เปิดวาล์วระบายสั้น ๆ เพื่อไล่อากาศ อัตราการไหลจะกลับมาทันที
Six verbs, once a week, a few minutes each. The chiller's filter and ozone do the daily work between them.หกขั้นตอน สัปดาห์ละครั้ง ครั้งละไม่กี่นาที ไส้กรองและโอโซนของชิลเลอร์ทำงานประจำวันแทนคุณ
Every item is in the RonYen Ice Bath Cleaning Kit — it shipped free with your bath.ทุกชิ้นอยู่ในชุดทำความสะอาดอ่างน้ำแข็ง RonYen — ส่งฟรีมาพร้อมอ่างของคุณ
The optional extra filter (the inline pre-filter) is only worth fitting when a medium-to-large number of people use the bath, feet come in dirty, or lint from clothing could reach the system. One or two people at home: the chiller's built-in filter is enough.ตัวกรองเสริม (อุปกรณ์เสริม) คุ้มที่จะติดเมื่อมีคนใช้อ่างจำนวนปานกลางถึงมาก เท้าสกปรกลงอ่าง หรืออาจมีเส้นใยจากเสื้อผ้าเข้าสู่ระบบ ถ้าใช้ที่บ้านหนึ่งถึงสองคน ไส้กรองในตัวชิลเลอร์ก็เพียงพอ
Two sanitisers, two jobs. The ozone works while the pump runs; the peroxide works the rest of the time.น้ำยาฆ่าเชื้อสองตัว สองหน้าที่ โอโซนทำงานขณะปั๊มเดิน ส่วนเปอร์ออกไซด์ทำงานในเวลาที่เหลือ
The chiller's ozone generator sanitises the water as the pump circulates — it kills bacteria and breaks down sweat and body oils, then turns back into ordinary oxygen within minutes, leaving nothing in the water.เครื่องผลิตโอโซนในชิลเลอร์ฆ่าเชื้อในน้ำขณะปั๊มหมุนเวียน — ฆ่าแบคทีเรีย สลายเหงื่อและไขมันจากผิว แล้วกลับเป็นออกซิเจนธรรมดาภายในไม่กี่นาที ไม่ทิ้งอะไรไว้ในน้ำ
Run it once after each session with the lid on, for 30–60 minutes. If the bath hasn't been used, one cycle a day is plenty.เปิดหนึ่งรอบหลังใช้แต่ละครั้ง โดยปิดฝาไว้ นาน 30–60 นาที ถ้าไม่ได้ใช้อ่าง วันละรอบก็เพียงพอ
Never while anyone is in the water, and never left running all day with the lid off — you'll smell it, and constant ozone gas is hard on seals and soft plastics over time.ห้ามเปิดขณะมีคนอยู่ในน้ำ และอย่าเปิดทิ้งไว้ทั้งวันโดยไม่ปิดฝา — จะได้กลิ่น และก๊าซโอโซนต่อเนื่องทำให้ซีลและพลาสติกเสื่อมเร็วในระยะยาว
Ozone only works while the pump is running and leaves nothing behind. The 6% hydrogen peroxide in the kit is the residual sanitiser — it keeps working in the water between ozone cycles, and alongside the ozone, not against it.โอโซนทำงานเฉพาะตอนปั๊มเดินและไม่ทิ้งฤทธิ์ไว้ ไฮโดรเจนเปอร์ออกไซด์ 6% ในชุดคือน้ำยาฆ่าเชื้อที่คงอยู่ในน้ำ — ทำงานต่อระหว่างรอบโอโซน และเสริมกับโอโซน ไม่ได้ขัดกัน
Dose it to the table below, lid on, and let the strips settle the rest.เติมตามตารางด้านล่าง ปิดฝา แล้วให้แถบทดสอบเป็นตัวตัดสินที่เหลือ
Both are safe on every RonYen bath — stainless, acrylic and PVC. It's chlorine products that do the damage; keep those away from the tub.ทั้งสองอย่างปลอดภัยกับอ่าง RonYen ทุกรุ่น — สเตนเลส อะคริลิก และ PVC สิ่งที่ทำลายอ่างคือผลิตภัณฑ์คลอรีน อย่าให้ใกล้อ่าง
With a chiller, the filter and ozone stretch a fill to weeks. When the strips say it's time:เมื่อมีชิลเลอร์ ไส้กรองและโอโซนช่วยยืดอายุน้ำได้เป็นสัปดาห์ เมื่อแถบทดสอบบอกว่าถึงเวลา:
Never run the chiller dry. Switch it off before you drain, back on after the refill.ห้ามเปิดชิลเลอร์ตอนไม่มีน้ำ ปิดเครื่องก่อนถ่ายน้ำ แล้วเปิดใหม่หลังเติมน้ำเสร็จ
| First fillเติมครั้งแรก | Weekly top-upเติมรายสัปดาห์ | |
|---|---|---|
| Per 100 Lต่อ 100 ลิตร | ~50 ml~50 มล. | ~15 ml~15 มล. |
| Barrel · 320 Lทรงถัง · 320 ลิตร | ≈ 160 ml — about a third of the bottle≈ 160 มล. — ราวหนึ่งในสามของขวด | ≈ 50 ml≈ 50 มล. |
Then dip a strip and adjust — the strips are the truth, the table is the starting point.จากนั้นจุ่มแถบทดสอบแล้วปรับ — แถบทดสอบคือคำตอบจริง ตารางเป็นเพียงจุดเริ่มต้น
≈ 2–3 first fills, or a couple of months of weekly maintenance on the barrel.≈ เติมครั้งแรกได้ 2–3 ครั้ง หรือดูแลรายสัปดาห์สำหรับอ่างทรงถังได้ราวสองเดือน
Never mix with chlorine pool products. Store the bottle out of the sun.ห้ามผสมกับผลิตภัณฑ์คลอรีนสำหรับสระว่ายน้ำ เก็บขวดให้พ้นแดด
An insulated stainless bath holds its temperature noticeably longer than PVC or timber-lined tubs — the chiller runs less and costs less to keep cold.อ่างสเตนเลสแบบมีฉนวนรักษาอุณหภูมิได้นานกว่าอ่าง PVC หรืออ่างบุไม้อย่างเห็นได้ชัด — ชิลเลอร์ทำงานน้อยลง ค่าไฟในการรักษาความเย็นก็น้อยลง
The full kit is ฿1,490 — all six items, delivered. Bath arrived before the kit existed? Same link — it fits every RonYen bath.ชุดเต็มราคา ฿1,490 — ครบหกชิ้น ส่งถึงบ้าน อ่างมาถึงก่อนจะมีชุดนี้? ลิงก์เดียวกัน — ใช้ได้กับอ่าง RonYen ทุกรุ่น
No circulation, no filter, no ozone — the water works harder. Same kit, same six verbs, shorter cycle.ไม่มีการหมุนเวียน ไม่มีไส้กรอง ไม่มีโอโซน — น้ำต้องทำงานหนักขึ้น ชุดเดิม หกขั้นตอนเดิม แต่รอบสั้นลง
Using plain water with no stabiliser? Change it every day. Using the kit? Dose it, test it, and a fill lasts a few days — let the strip tell you, not the calendar.ใช้น้ำเปล่าไม่ใส่สเตบิไลเซอร์? เปลี่ยนน้ำทุกวัน ใช้ชุดทำความสะอาด? เติมน้ำยา ทดสอบ แล้วน้ำจะอยู่ได้หลายวัน — ให้แถบทดสอบเป็นตัวบอก ไม่ใช่ปฏิทิน
Melting ice is new water — it dilutes your stabiliser. After a big ice session, dip a strip and top up the dose.น้ำแข็งที่ละลายคือน้ำใหม่ — มันเจือจางสเตบิไลเซอร์ หลังใส่น้ำแข็งเยอะ ๆ ให้จุ่มแถบทดสอบแล้วเติมน้ำยาเพิ่ม
Stabiliser, strips, net, brush, cloths, thermometer — ฿1,490 for the lot.สเตบิไลเซอร์ แถบทดสอบ ตาข่าย แปรง ผ้า เทอร์โมมิเตอร์ — ทั้งชุด ฿1,490
This is material care for the PVC drop-stitch shell — the water routine is the same as any bath: section 2 with a chiller, section 3 without.นี่คือการดูแลวัสดุของตัวอ่าง PVC แบบดรอปสติช — ส่วนการดูแลน้ำเหมือนอ่างทั่วไป: ส่วนที่ 2 เมื่อมีชิลเลอร์, ส่วนที่ 3 เมื่อไม่มี
The 6% stabiliser is fine diluted in the water. Wiping seams directly? Dilute first — never apply neat to seam welds.สเตบิไลเซอร์ 6% ใช้ได้เมื่อเจือจางในน้ำ จะเช็ดตะเข็บโดยตรง? เจือจางก่อน — ห้ามใช้แบบเข้มข้นกับรอยเชื่อมตะเข็บ
No solvents, alcohol or chlorine concentrates — they attack PVC and the seam welds.ห้ามใช้ตัวทำละลาย แอลกอฮอล์ หรือคลอรีนเข้มข้น — ทำลาย PVC และรอยเชื่อมตะเข็บ
Mould starts in the folds — the silicone brush is made for exactly this.เชื้อราเริ่มที่รอยพับ — แปรงซิลิโคนมีไว้เพื่อสิ่งนี้โดยเฉพาะ
UV fades and embrittles PVC and warms the water. Keep it out of the sun.รังสี UV ทำให้ PVC ซีดและเปราะ และทำให้น้ำอุ่นขึ้น เก็บให้พ้นแดด
Flush the gunk out at each water change — it's where everything collects.ล้างคราบออกทุกครั้งที่เปลี่ยนน้ำ — เป็นจุดที่ทุกอย่างไปสะสม
Fold it damp once and it comes out speckled. Air it fully, then deflate, fold and store indoors.พับทั้งที่ชื้นแค่ครั้งเดียว เปิดมาจะมีจุดด่าง ผึ่งให้แห้งสนิท แล้วปล่อยลม พับ และเก็บในร่ม
Watch the sharp things. Jewellery, pet claws and anything pointed near the shell. If it ever does get a nick — your repair kit is in the box.ระวังของแหลมคม เครื่องประดับ เล็บสัตว์เลี้ยง และของปลายแหลมใกล้ตัวอ่าง ถ้าเกิดรอยขีดข่วน — ชุดซ่อมอยู่ในกล่อง
One kit covers the whole range — stainless, acrylic and inflatable baths all use the same six items.ชุดเดียวครอบคลุมทุกรุ่น — อ่างสเตนเลส อะคริลิก และเป่าลม ใช้หกชิ้นเดียวกัน
The same guide as a PDF, in Thai and English — for the person who looks after the bath, or to print and keep by the chiller.คู่มือเดียวกันในรูปแบบ PDF ทั้งภาษาไทยและอังกฤษ — สำหรับคนที่ดูแลอ่าง หรือพิมพ์เก็บไว้ข้างชิลเลอร์

Hydrogen peroxide stabiliser 500 ml · test strips ×30 · stainless-frame skimmer net · long-handle silicone brush · microfibre cloths ×2 · floating thermometer.สเตบิไลเซอร์ไฮโดรเจนเปอร์ออกไซด์ 500 มล. · แถบทดสอบ 30 ชิ้น · ตาข่ายช้อนโครงสเตนเลส · แปรงซิลิโคนด้ามยาว · ผ้าไมโครไฟเบอร์ 2 ผืน · เทอร์โมมิเตอร์ลอยน้ำ
Questions about your setup? Reply to your order email, or call or LINE us — a real person who knows your bath answers.มีคำถามเกี่ยวกับการติดตั้ง? ตอบกลับอีเมลคำสั่งซื้อ หรือโทร/LINE หาเรา — คนจริงที่รู้จักอ่างของคุณเป็นผู้ตอบ
Outdoor and indoor cabins, barrels, cylinders, cube and modern designs, plus sauna-and-shower combos — from a compact one-person unit up to fourteen-person commercial rooms. Every model is made to order and customisable to your space. Browse saunas.
Red Cedar and Finnish Thermo Pine both handle heat and humidity beautifully — cedar for its aroma and natural rot resistance, thermo pine for its stability in wet conditions. Japanese Hinoki is our premium pick. Canadian Hemlock is excellent value for indoor cabins. We’ll match the timber to your budget, look and location.
Outdoor saunas are fully weather-sealed for gardens, rooftops and pool decks. Indoor models are built for bathrooms, gyms and spare rooms. Both use the same indoor-rated electric stone heaters — the difference is the exterior cladding and weatherproofing.
It depends on the internal volume of the cabin. As a guide: 4.5kW for 3–6 m³, 6kW for 5–8 m³, 9kW for 8–11 m³, 12kW for 11–15 m³, 15kW for 13–18 m³ and 18kW for 15–20 m³. Above 20 m³ takes two heaters. Up to and including 9kW runs on single phase; above that is three phase only, which in practice means anything from a six-person cabin upwards. We confirm the exact requirement in your quote so your electrician knows precisely what to install.
Both are food-grade and corrosion-resistant. 316 adds extra protection for coastal air and chlorinated water, so it’s the safer choice near the sea or beside a pool. 304 is excellent value everywhere else. We’ll recommend the right grade for your site. See ice baths.
Ice works to get started, but it melts fast in Thailand and gets expensive. A chiller holds a precise temperature day after day with no effort — it’s the easiest way to make cold therapy a daily habit rather than an occasional event.
Our chillers run from 0°C to 42°C, so the same unit chills in the hot season and heats in the cool one. Most people plunge between 3°C and 10°C. Beginners usually start around 12–15°C and work down over a few weeks.
Our chillers include filtration and ozone sanitation that keep the water fresh for weeks between changes: run the ozone for 30–60 minutes after each session with the lid on, and the hydrogen peroxide in the cleaning kit keeps the water clean in between (about 160 ml on a fresh 320 L fill, then ~50 ml a week, checked with a test strip). Both are safe on stainless, acrylic and PVC baths. We walk you through it at handover — it’s far less work than a pool.
Yes. Our brochures are on the site as downloads and we can email them to you. Because every sauna is made to order, the catalogue shows configurations and starting prices rather than a fixed range. Download the brochures.
The room dimensions, whether it is indoor or outdoor, how many people, and roughly where you are. If you have a floor plan, send that. From those four things we can quote accurately.
Yes, three ways. Come to the wellness garden and showroom in Ban Suan, Chonburi, ten minutes from Central Chonburi — there is a working sauna and ice baths you can use, by appointment. We hold finished samples of all four timbers. Or we will bring the samples to you: we travel anywhere in Thailand for a fee, and that fee comes off the price of your order when you buy. Book a consultation.
Yes. RonYen Wellness Co., Ltd is VAT registered and can issue full tax invoices. Ask us for the registration document if your accounts department needs it for approval.
Yes. We deliver to Koh Samui, Koh Phangan, Koh Tao, Koh Kood and Phuket regularly. Island delivery carries a supplement over mainland freight, quoted per job, and adds a few days. Tell us the island and we will price it with the quote rather than after.
We service Thailand and Laos. We are not set up for shipping further afield at the moment.
Mainland delivery is included in the price. Islands and remote provinces carry a supplement, quoted with your order.
Yes — we deliver right across Thailand by freight. Wherever you are, we’ll get it to you. Delivery details.
Occasionally, depending on the unit and where it is. Send us photographs of the heater, the control gear and the cabin and we will tell you honestly whether it is worth us coming or whether a local electrician can sort it for less.
Heater elements, stones, control panels and thermostats for the heaters we supply, held in Thailand. If you have another brand, tell us the model and we will say whether we can help.
Not currently.
Yes, for saunas in commercial operation. A room running twelve hours a day carries four to six times the load of a home installation, and scheduled servicing is what keeps it performing and keeps the warranty intact. Commercial servicing.
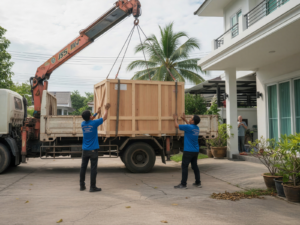
Yes — every sauna arrives in a sealed timber crate with the wall sections already built, and most assemble in a day with two or three people and the supplied instructions. No specialist tools needed. Prefer it done for you? Our team can handle the full install. Installation service.
Delivery to the spot, full assembly, levelling, fitting the heater, and a handover walkthrough so it’s ready to use the same day. It’s the easy option if you’d rather not build it yourself.
A firm, level base — a concrete pad, deck or paved area — plus a power point within reach for the heater. We send a simple prep checklist before delivery so everything’s ready when your sauna arrives.
The final hard-wire connection of the heater should be made by a licensed electrician — that part isn’t included, for safety and compliance. We supply the full heater specification and can recommend trusted local contractors.
Reserve online in a couple of minutes — pick a plan, a date and a time slot, and choose to pay online or on arrival. You’ll get a confirmation by email and text.
The Garden runs on advance bookings so every session has the space to itself — so book ahead if you can. That said, if you're passing and spot us, scan the sign at the gate or give us a call, and if there's room in the current session we'll happily wave you in.
Saunas, ice baths, a swimming pool and shaded lounge areas — everything you need for the full hot-and-cold circuit, in a quiet private garden. A towel, flip-flops, a locker and your first drink come free with every visit. Explore the garden.
It’s in Chonburi, easily reached from Bangkok and Pattaya. We’re in a private gated community — when you arrive, look for the RonYen sign at the gate and we’ll open it for you. We text a reminder before your session so we’re ready and waiting.
Get a straight answer on what suits your space, budget and the Thai climate — free and with no pressure.
Book a free consultation All Articles
The sauna in a private garden is used four or five times a week by the same two…
 All Articles
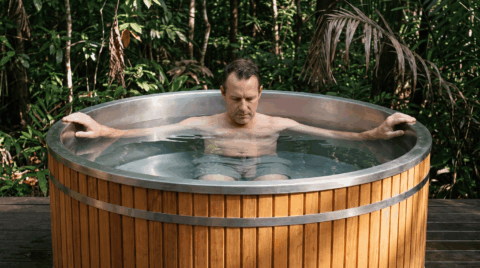
For several years, I’ve been taking cold water baths, and the first thing that no one ever tells…
 All Articles
The majority of the enquiries come exactly as described. A person messages us to say that they would…
A sauna or ice bath is a long-term addition to your home or commercial space. Tell us about your project, your goals and your timeline — we’ll give you a straight answer, including what the right options are.
Free consultation. Phone call, video call, or visit our showroom in Ban Suan, Chonburi — Rön Yen Shop & Wellness Garden — by appointment. Tell us your space and budget, and we’ll talk through the options with no pressure to buy.
Ban Suan, Chonburi — 10 minutes from Central Chonburi
Tell us where to send it. We'll email your quote with all the products and options you've selected.
Taking you to the confirmation page…